
BABY CHANGING STATION DRESSER
With our new addition to the family due any day, I had to work quickly to build a brand new baby changing table dresser, but that didn't mean leaving out important features.
I wanted to create the ultimate changing table, complete with diaper storage, drawers, a built-in changing pad and even LED lights.
Here's how it's done:

Creating the Dresser Frame
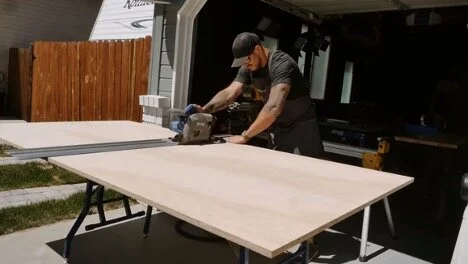
To begin, I took my three-quarter-inch maple plywood and cut out the top, bottom, back, and sides of the new dresser. Unlike some projects, you may not need a table saw for this. A decent track saw should do the job just fine.
Connecting the Base Pieces

With all of the pieces cut, I used a combination of wood glue and two-inch brad nails to fix them together.
To help me out, I took a couple of low-cost corner clamps that would hold the pieces in place once I'd applied the glue.

I could then move the frame around easier to add the screws for extra strength and durability before finally removing the clamps altogether.

Adding an Internal Divider
With the main dresser frame complete, I made sure to fit an additional piece of plywood down the center. This will serve as the divider between the large drawers and the diaper storage unit.

Adding Support Pieces

To finish off the frame, I added two supporting pieces at the back. Again, this provides some added strength and durability, ensuring our new baby changing dresser is built to last

Sanding and Edge Banding

...and then edge banding with a simple iron-on veneer

Once you've ironed the veneer across the edges of the frame, you may need to go over it and trim off any excess veneer with a blade.

When that's done, you can take a standard 80 or 100-grit sandpaper, wrap it around a block of wood and use it to smooth down those edges.
Creating the Drawers
I used half-inch maple plywood for the drawers, with quarter-inch plywood for the bottom of the drawers.

After cutting out the pieces for each drawer, I added pocket holes to secure them in place...

...And used my blade to create a quarter-inch channel so that the bottom would slot securely into place with ease.

Finally, after putting the drawers together...

...I used my sander to clean them up and make them nice and smooth.
Adding Drawer Slides

With that done, I could add the drawer slides and fit the drawers into place.

Door and Drawer Faces

Up next, I set about creating the door for the diaper storage cupboard and the faces for the drawers. You could keep these nice and simple if you wanted to, but I put a bit of extra time into creating some attractive patterns to enhance the overall look of the finished dresser.

Safety Frame
Next, I took some leftover wood to create a frame around the baby changing area because nothing matters more than safety!

Priming and Painting
After giving the whole dresser one last sanding down, I added one coat of primer before getting to work on the painting.

A word of warning here:
Avoid using latex paint on your dresser. As it's water-based, it comes off far too easily. Instead, I prefer to use a type of paint called emerald urethane alkyd which works much better.
Adding the Legs

One of the final parts of this project was to take a few pieces of metal left over from another job and weld them together to create the base legs. I then primed and painted this before taking it into the nursery to put the whole thing together

LED Lights
Last but not least, I took a standard set of LED lights that I got from Amazon and added them to our dresser

With that done, we had ourselves a fully-finished changing table dresser all ready and waiting for our new baby’s arrival.
